
Another recent project has lead me down the path of creating custom site definitions for use within my organization. My requirements are as follows:
- Must be based off the current team site definition
- Must include a PowerPoint slide library with example slides (required MOSS standard)
- Must include a picture library with example photographs
- Must remove SharePoint branded logo and use company logo instead
- Should include custom announcements on the front page
- Should provide links to common staff resources
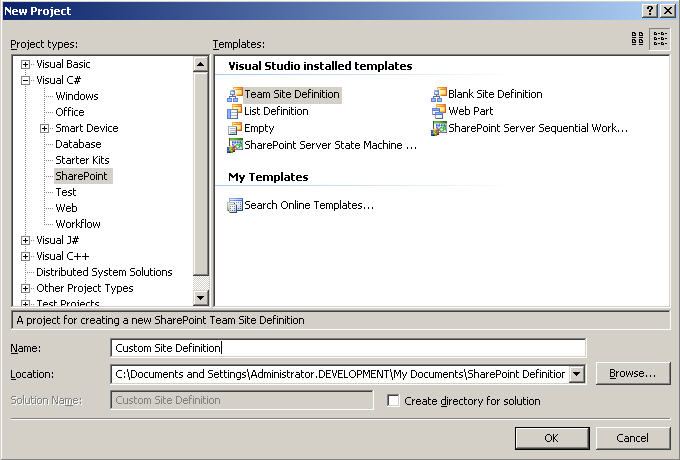
So, the first thing I did was to download the VS 2005 Extensions for SharePoint Services 3.0. Once installed on my development server, I created a new project based off the Team Site Definition included as part of the newly installed VS 2005 Extensions for SharePoint Services 3.0.
When the project is created, the project automatically opens up the onet.xml file that needs to be modified to create the additional lists. I need to include two new lists that are not part of the original definition for a team site. This includes a picture library and a slide library. Find the Lists element in the onet.xml file and add two new entries:
<List Title="Shared Pictures"
         QuickLaunchUrl="Pictures/Forms/AllItems.aspx"
         Url="Pictures"
         Type="109"
         FeatureId="00bfea71-52d4-45b3-b544-b1c71b620109"/>
<List Title="Shared Slides"
         QuickLaunchUrl="Slides/Forms/AllItems.aspx"
         Url="Slides"
         Type="2100"
         FeatureId="0BE49FE9-9BC9-409d-ABF9-702753BD878D"/>
The first list item is based on type 109 which is the default picture library that is included as part of SharePoint. I have to include the feature that the list is based on as the FeatureId attribute. Notice that I have given a custom url instead of a url that includes a space. This should help my users with navigation to these libraries.
The second list took a little investigation. I opened up an explorer window and viewed the contents of <Program Files>/Common Files/Microsoft Shared/web server extensions/12/FEATURES folder and looked for the Slide Library feature. I opened the folder and then viewed the contents of the feature.xml file. I copied the GUID that was in the file and placed this as my GUID on the new list. I also noticed that the list type (from opening the referenced files in the elementmanifests node) was 2100. Now I have all I need to create a new Slide Library.
The next step was to add the necessary features to the WebFeatures node of the onet.xml file. Since both features need to be activated at the site level (and not the collection), I ignore the SiteFeatures node and made sure that my WebFeatures node included the following:
<WebFeatures>
     <Feature ID="00BFEA71-4EA5-48D4-A4AD-7EA5C011ABE5"/>
     <!-- TeamCollab Feature -->
     <Feature ID="F41CC668-37E5-4743-B4A8-74D1DB3FD8A4"/>
     <!-- MobilityRedirect -->
     <Feature ID="00bfea71-52d4-45b3-b544-b1c71b620109"/>
     <!-- Picture Library -->
     <Feature ID="0BE49FE9-9BC9-409d-ABF9-702753BD878D"/>
     <!-- Slide Library -->
</WebFeatures>
Now I have everything set up and can provision a site that will automatically include both a slide library and a picture library by default.
Next, I need to include some sample photos and slides for both of these new libraries. This is done using modules. You will notice there are two places in the onet.xml file that include a Modules node. The first one is included in the Configuration node and the second is in a Modules node outside of the Configuration Node. We need to include references to the new modules inside the Configuration node first.
So, simply add a new Module node for each of the new libraries. You can use the model already in-place for the Default module (this module includes the default.aspx page for the site and it's included web parts). I called my modules Images and Slides.
<Modules>
        <Module Name="Default"/>
        <Module Name="Images"/>
        <Module Name="Slides"/>
</Modules>
Now I move to the Modules node and define the contents of the Images and Slides modules.
    <Module Name="Images" Url="Pictures" Path="" List="109">
      <File Url="coastaltown.jpg" Type="GhostableInLibrary">
        <Property Name="Title" Value="Coastal Town"/>
        <Property Name="ImageCreateDate" Value="<ows:TodayISO/>"/>
        <Property Name="Description" Value="A nice quiet view of a coastal village as one might view on the Mediterranean sea."/>
      </File>
      <File Url="steamshed.jpg" Type="GhostableInLibrary">
        <Property Name="Title" Value="Old Steam Shed"/>
        <Property Name="ImageCreateDate" Value="<ows:TodayISO/>"/>
        <Property Name="Description" Value="An old logging shed powered by a steam furnace"/>
      </File>
    </Module>
    <Module Name="Slides" Url="Slides" Path="" List="2100">
      <File Url="SharePoint_Overview_Training_011.ppt" Type="GhostableInLibrary">
        <Property Name="Presentation" Value="SharePoint Overview Training" />
        <Property Name="Description" Value="What is the SharePoint?" />
      </File>
      <File Url="SharePoint_Overview_Training_174.ppt" Type="GhostableInLibrary">
        <Property Name="Presentation" Value="SharePoint Overview Training" />
        <Property Name="Description" Value="SharePoint Team Site Layout" />
      </File>
      <File Url="SharePoint_Overview_Training_175.ppt" Type="GhostableInLibrary">
        <Property Name="Presentation" Value="SharePoint Overview Training" />
        <Property Name="Description" Value="Global Links Bar" />
      </File>
    </Module>
You must set the file type attribute to GhostableInLibrary or the items will not be displayed in your libraries. Also, each Module node gives the files their destination location. This is done view that url attribute and the list attribute. I then set some properties on each of the items that I am including in these libraries using the Property nodes.
Now, to remove the SharePoint logo and add your own, I just need to make changes to the Default module. See the changes below:
    <Module Name="Default" Url="" Path="">
      <File Url="default.aspx" NavBarHome="True">
        <View List="$Resources:core,lists_Folder;/$Resources:core,announce_Folder;" BaseViewID="0" WebPartZoneID="Left"/>
        <View List="$Resources:core,lists_Folder;/$Resources:core,calendar_Folder;" BaseViewID="0" RecurrenceRowset="TRUE" WebPartZoneID="Left" WebPartOrder="2"/>
        <AllUsersWebPart WebPartZoneID="Right" WebPartOrder="1">
          <![CDATA[
                   <WebPart xmlns="http://schemas.microsoft.com/WebPart/v2" xmlns:iwp="http://schemas.microsoft.com/WebPart/v2/Image">
                        <Assembly>Microsoft.SharePoint, Version=12.0.0.0, Culture=neutral, PublicKeyToken=71e9bce111e9429c</Assembly>
                        <TypeName>Microsoft.SharePoint.WebPartPages.ImageWebPart</TypeName>
                        <FrameType>None</FrameType>
                        <Title>$Resources:wp_SiteImage;</Title>
                        <iwp:ImageLink>/PublishingImages/norm_logo.png</iwp:ImageLink>
                        <iwp:AlternativeText>Company Logo</iwp:AlternativeText>
                   </WebPart>
                   ]]>
        </AllUsersWebPart>
        <View List="$Resources:core,lists_Folder;/$Resources:core,links_Folder;" BaseViewID="0" WebPartZoneID="Right" WebPartOrder="2"/>
        <NavBarPage Name="$Resources:core,nav_Home;" ID="1002" Position="Start"/>
        <NavBarPage Name="$Resources:core,nav_Home;" ID="0" Position="Start"/>
      </File>
    </Module>
Now I have created the site definition, all I need to do is copy the files referenced in my modules to the Site Definition folder of my project. This will be compiled into the WSP solution file by the project. Keep in mind that these files will increase the overall size of your WSP solution file.
Now, I deploy the solution by right clicking on the project and choosing Deploy.
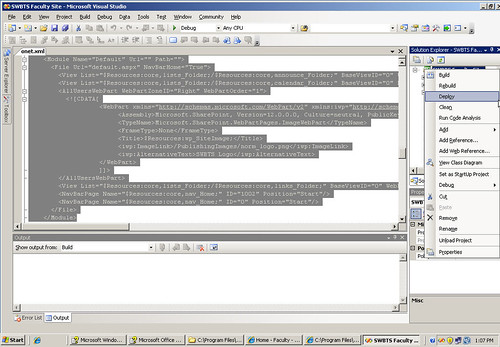
This will build my project files and automatically deploy it to the local sharepoint server. When I navigate to my site and choose to create a new site, my custom site definition is included under a newly created category, Development. When I provision the new site, it includes my new libraries and example files.
If you want to make changes to the category, just right click on the project and choose properties. Then you can click on the SharePoint Solution tab and make modifications to the solution and site definition files from here.


No comments:
Post a Comment